Article Navigation
Use these links to quickly navigate around the article:
3 Steps to Integration
Step 1: Enable LTI Launch
First, you must enable the LTI launch from within your Canvas course to connect it to ExPrep. In doing so, you will create a new course in ExPrep which will be tied to your Canvas course.
- Navigate to the appropriate course in Canvas
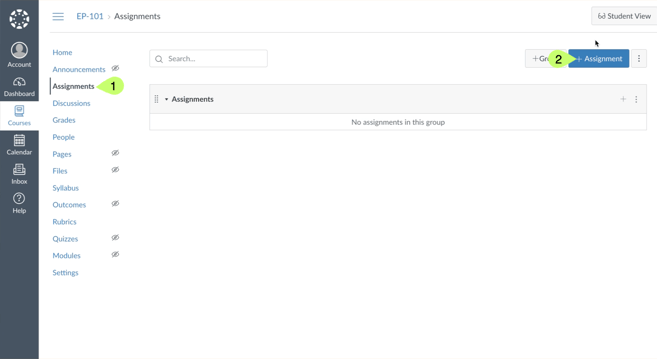
- From the Home page, select the Assignments menu on the left
- Select the + Assignment button to create a new assignment which will launch you into the ExPrep Portal.
- Name the new assignment 'ExPrep Launch'
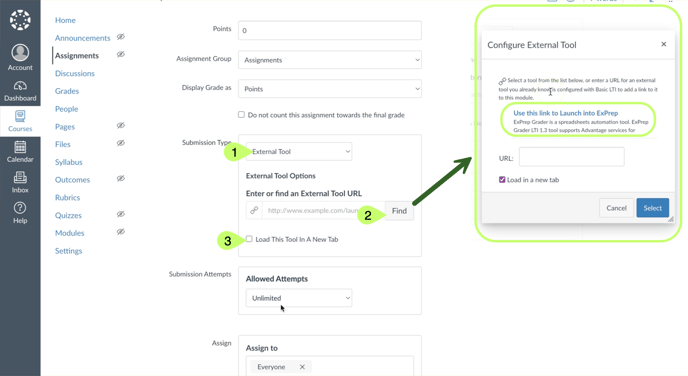
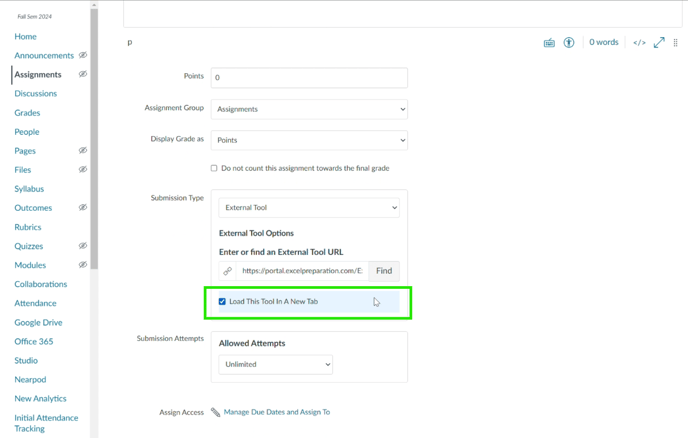
- Under the Submission Type select External Tool from the drop down menu
- Click Find
- Select the ExPrep Grader LTI1.3 tool from the pop-up
- The text for the tool will display ‘ExPrep Grader - Create Course’
- Check the box associated with ‘Load This Tool In A New Tab’
 Save the assignment
- Navigate back to the newly created assignment in Canvas and click the ‘Load ExPrep Launch in a new window’ button
- You will be launched into ExPrep. When you see the Welcome Message, select Proceed
- The course name will match the name as provided by Canvas (How to Change an ExPrep Course Name)
- You can now delete the temporary “ExPrep Launch” assignment or hide it from students
Frequently Asked Questions
❓Can I leave this link in my Canvas page as a "portal launch link?"
Yes! If you delete it, students will be able to access the portal through any assignment link, but this launch link will give them a way to view the portal as a whole.
❓If I delete this assignment and decide I want the portal link later, can I re-create this link?
Yes! This link will only create a class the first time you use it. After that, it will take you into the already-created course.
SEE IT IN ACTION:
-gif.gif?width=688&height=377&name=2024-08-02_15-23-42%20(1)-gif.gif)
Step 2: Add Assignments to ExPrep Course
In the second step you will add assignments to your newly created ExPrep course. You can copy assignment content from an existing course or create new assignments. If you are unfamiliar with how to create assignments inside of ExPrep, please find additional resources linked below.
| HOW TO: Create a New Assignment | HOW TO: Copy an Existing Assignment |
Frequently Asked Questions
❓What if my assignments aren't ready or I want to change them?
Consider adding our Student Orientation Assignment as a first assignment to your course. Even if all your assignments are not ready, it will be great to practice with this one - for yourself and the students.
Step 3: Import the ExPrep Assignments into the Canvas Course
- After your assignments are available in your ExPrep course, navigate to the
Exams/Assignments tab. - Select Sync Assignments from the upper right hand corner.

- From the popup window, select the exams from the list ‘Exam(s) – Need to Link with LMS’ you would like to connect with Canvas and hit Select to Sync.

-gif.gif?width=688&height=531&name=2024-06-25_10-01-12%20(1)-gif.gif)
Frequently Asked Questions
❓Do I have to select all of my assignments at once?
Not if you don't want to! This step can only be completed once for each assignment, but you do not have to select all of your assignments at once.
- Navigate back to Canvas
- Select the Modules from the lefthand menu
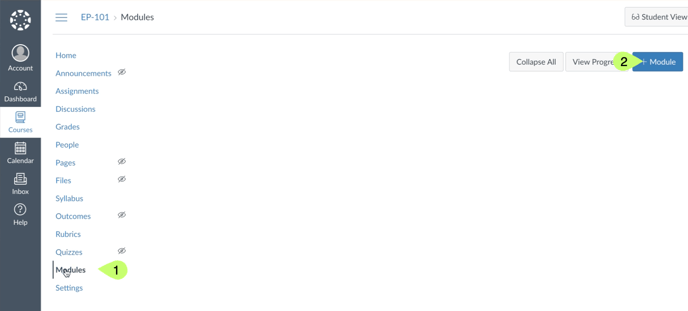
- Create a new module named 'ExPrep Content'
- Once the new module is created select the + button in the upper right hand side of the module to add your ExPrep Assignments.
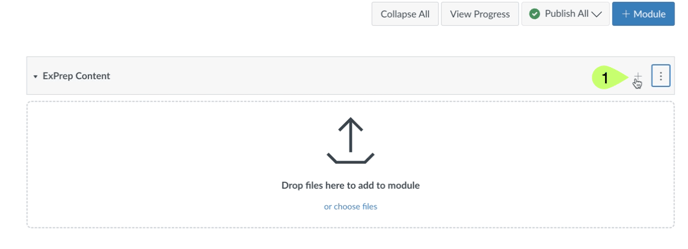
- A new window will be display. On the first drop-down menu available, change the drop-down to External Tool and select ExPrep Tool from the list
 The text for the tool is ‘ExPrep Grader - Link Assignment’
 - Once you select the tool link from the list, you will notice a pop-up with a message indicating that the assignments were created -or- a requesting your approval to create the assignments.
- If the system requests your approval, please approve it to create the assignment links in Canvas
- At this point, the assignments you chose to sync in ExPrep are created in Canvas under the ExPrep Content Module.
Frequently Asked Questions
❓Could I just do this step in "Assignments?"
The way Canvas imports the assignments, this deep link, has to go through modules. It will create assignments, but it has to be done through modules.
❓What if I don't want this module?
You will generate all ExPrep assignment links inside of this module. You can move the assignments to a different module later (after the initial sync process) if you would like.
⚠️ Warning: This step of creating an assignment in Canvas can only be completed once. If you delete the Canvas assignment that is connected to the ExPrep assignment, your grades will not import.
If you do accidentally delete a Canvas assignment, please reach out to ExPrep Support to walk through the process of creating new assignments and linking those.
- The ExPrep assignments will now be in your Assignments, and by default they will be assigned to the first category in your gradebook. Edit the assignment settings if you would like to change the category.
- Once the course itself and these assignment links are published, the student will be able to use them to launch directly into ExPrep
- Navigate to the grade book and confirm that all of the ExPrep assignments that you selected to sync now have a column present.
SEE IT IN ACTION:
-gif.gif?width=688&height=377&name=2024-08-02_15-35-39%20(1)-gif.gif)
⚠️ If you are a professor who will add new content throughout the semester, please note: every time you have new assignments that need to sync into your Canvas class, select them to sync in the portal using the "Sync Assignments" button, and then run the external tool in your ExPrep Content module.
Step 4: Final Settings For Canvas
- Return to the ExPrep Portal and make sure you can see all your assignments (if not, click "Exams/Assignments" to load the whole list). Under the "Linked To" column, there should be no named assignments.
- Click "Sync Assignments" and you'll see a list of exams under the heading Verify the Link with LMS. Select all and hit "Verify Status.
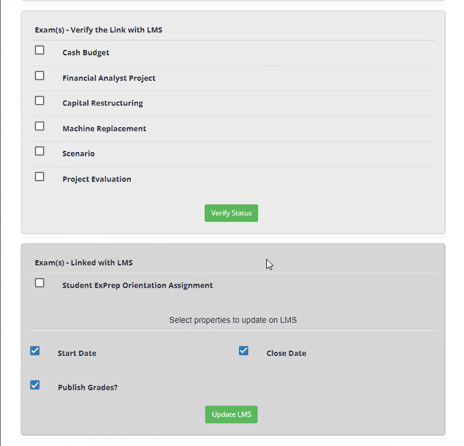
- Refresh the portal and you should now see an assignment name under the "Linked To" column

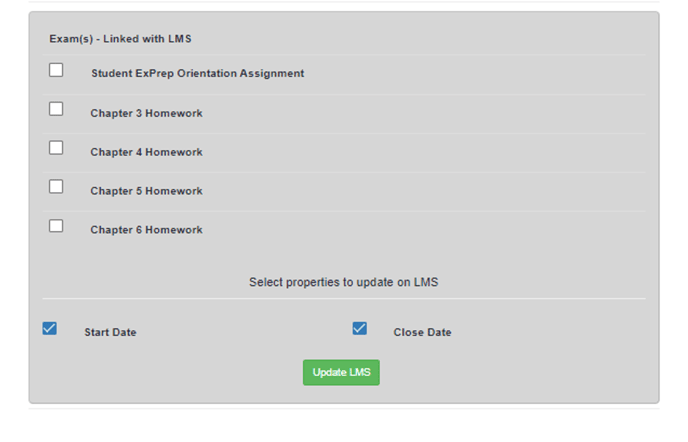
- When you have updated the dates for your assignments in the ExPrep portal, hit Sync Assignments again, select all, and hit "Update LMS" to push the dates to Canvas.
Congratulations! If you have any further questions or concerns while following these instructions, please contact ExPrep Support here.
FAQ
Visit this link for a FAQ document regarding LTI Integration.
Troubleshooting
⚠️⛔Warning: Do not delete any assignments from Canvas in the hopes of running the deep link again and re-creating the assignments. This will not work.
Seeing this error?
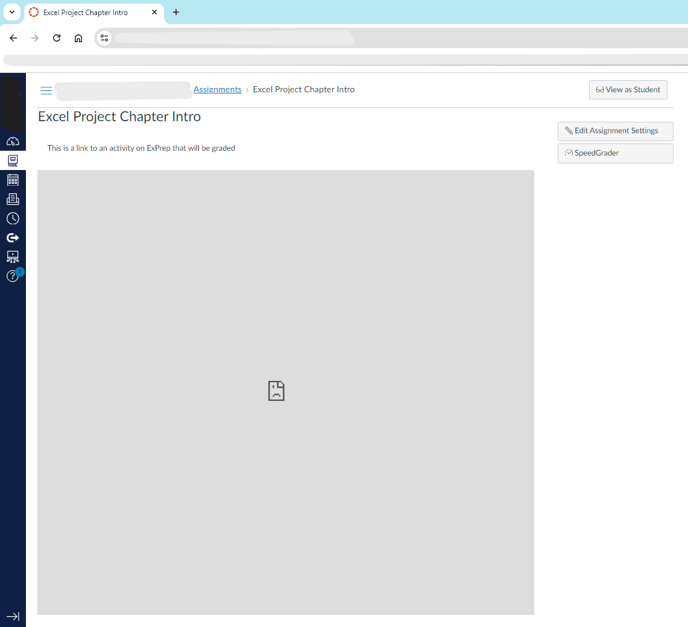
Click "edit assignment settings" and make sure "load in a new tab" is selected for every assignment.
Receiving an error when trying to enter assignments from student view?
The Student View in Canvas will not allow you to enter the ExPrep portal, as the Test Student in Canvas is not a real student and the portal will not create an account. The links will only work with a real student account.
Are the assignments showing up in the ExPrep Portal as "Inactive"?
Two options to verify the syncing of your assignments:
1. Verify the link by clicking "Sync Assignments" and checking any assignments to verify the link.
2. When you (or students) click into any assignment from the LMS, it will verify the links and the connection between the two.
💡Sometimes links won't verify from option 1 - if that is the case, try clicking into the assignment from Canvas into the portal and the assignment link should verify.
Have multiple course sections?
The integration process must be completed for each individual Canvas course, even if they are multiple sections of the same academic course. If you import the Canvas content from one course to another, the assignments will show up, but will give an error that looks like this:
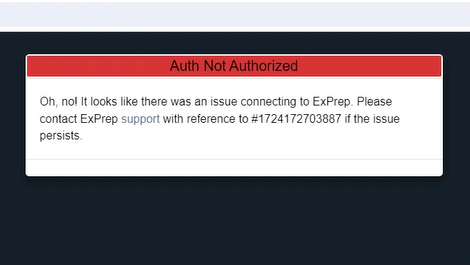
Ensure you complete steps 1-3 above for every individual Canvas course, and then if you have separate links (set up on pages, etc) verify they are connected to the assignments for that section and not linking to a previous course.